Showing posts with label tutorial. Show all posts

1.31.2011


This messy mess I could bear no longer
though I quite think
this photo makes it seem so lovely.


 In truth it was not so lovely.
Being the first thing to be seen 
upon entry to our homey home
today it greeted fair guests no more.

Gathering another canvas from Our Dear One and Her Love's wedding,
(only three more lovelies awaiting their fate remain)
some cotton batting,
an ample piece of vintagy wool blanket


 one rather handy staple gun,


and a few minutes stolen 
from time that really should be spent
reading and preparing 
for a logic and literature class
that a handful of homeschoolers
await for me to teach
on the day next,


And voila!


Surely Now I can think
heady thoughts
of symbolism and plots,
for one little eensy piece
of my homey home


has a little touch of order
mingled with beauty,
happy reminders of days past,
and friends so dear.


Now off to the smarty books I go...

11.19.2010

A Journal Was Made


A journal was made
for a dear friend so sweet,
who from her place far away
sends me lovely notes on scraps of paper.

Paper torn and layered,
then covered
with doodles.
Whimsical doodles,
of flowers,
squiggles,
butterflies and such.

A multitude of designs
happy and bright 
intertwined with heart felt notations
of memories of time together spent
and hopes of new shared moments yet to come.

A journal was made
with my own Quilty squiggles


 and buttons
and stitches
french knots
a scrap
and more stitchy doodles


for my friend far away
to fill with her doodley art....

until we again shall meet.


 ******

To make a journal for a dear friend of your own, sew a tube that fits over the ends, that is nearly twice as long as your book laid open (no rulers and math necessary), and with edges  neatly finished. I only did my quilty stuff on the  front  part of the tube using free motion quilting. This is a picture of the back of the tube. You can see how very long it is and the one seam down the middle. The fun part is embellishing it with doodles and odds and ends.

5.27.2010

Sewing with Kids - Caleb's Quilt

I love to sew.
By nature I love to teach.
And since my kids are growing up, I want to take the time, let the house get messy and use my talents to give them a love for sewing before they jump the coop. And while I'm at it, and since                                       
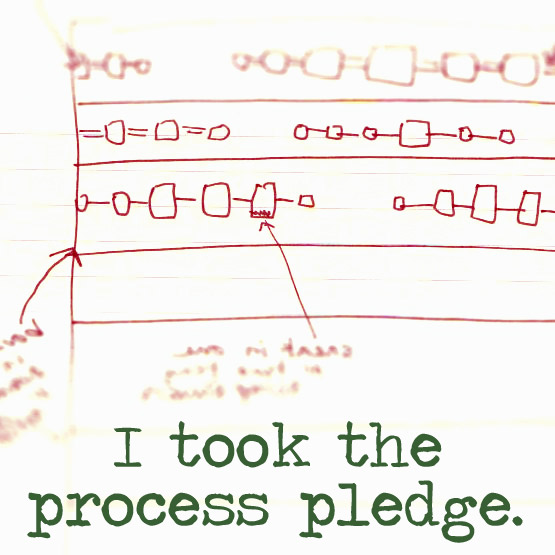
                                                  The Process Pledge
I'll let you watch over my shoulder so you, too, can teach your kiddos - or yourself - to enjoy sewing.
And, please, please...
If something doesn't make sense, or if it seems I skipped a step, do let me know. Any questions are absolutely welcome! If you are still intimidated by such a feat and you are local, give me a call. Maybe we can get a group together to do a class in my home.

 Also, I divided it out in days. This is pretty much how Caleb and I did it. Making this all in different chunks helps the project remain a fun endeavor for all. Each step ends with good results keeping them begging for more. Sort of like how great books tempt you to read on by ending each chapter with a hint of what morsel of adventure is to come.
Day 1

To begin, I sat a while with pencil and paper and came up with this basic pattern. I wanted to incorporate rows of printed fabric, and rows of solid fabric. Using solid colors as much as possible helps to both keep the cost down and create interesting design.


Day 2 

Then we went to the fabric store. I have to say I didn't let him choose just anything. After deciding on one or two favorite prints in colors I could enjoy around the house (no cartoon characters or tacky stuff, please) I showed him how to take that bolt of fabric and walk around holding it up to other fabrics in order to find similar color families. It definately took guidance from me. And alot of time. Try to go when it can just be the two of you and when you are not in a rush. Make a 'date' of it. For this quilt, we used 8 quarter yard strips of prints. (*You will need to be able to cut atleast 42 5"x9" blocks out of a mix of fabrics if you are using scraps) At home, we left them stacked neatly on the table till we were ready for our next sewing adventure...


Day 3

 A few days later we cut all the blocks. Here Caleb is making the edge of our first strip even.


 Here we are cutting it in 5" increments on a strip that is 9" wide making blocks 5"x9". Notice I am helping to hold the ruler while he cuts. It has a tendency to slip leading to crooked lines. Plus, I just plain old feel better being there when a razor blade is being used. It's that mom thing. I didn't walk away to pick up around the house during this step!


 Here he is with a beautiful stack of blocks. We only needed 50 5"x9" blocks, but we cut a few extra to help when we lay it all out.  But that is for another day!


So far, so good.

5.21.2010

Modern Quilt


Here is the whole process showing how this Modern Quilt was made for my son's 18th birthday.

Front


Back


To create this modern quilt I started with small amounts of 4 different prints. Then I found Kona solid fabrics that matched, a light grey and black. I decided on the darker grey to become the main fabric for the sashing - the fabric between the main squares.

Without prewashing the fabrics, I began to cut strips to make blocks. To build each square, as I sewed together 2 strips of fabric on my machine, I then ironed it and squared the edges with my ruler, mat and cutter before connecting the next piece. It is alot of up and down from the machine to the ironing board, then the cutting mat, but it really didn't take too long.


There are 4 blocks with light grey as the background, and 6 more with black as the background. I made the 4 squares with the light grey background first, then tried to make the next 6 squares with the black background in varying shapes.


I just laid them out as you see here. No measuring, really. I just made a guess at each piece, arranging them quite at a whim.


I then added the darker grey sashing forming them into the bigger shapes you see below. I essentially ended up with one long rectangle (farthest left strip), 2 smaller rectangles (top middle and top right strips) and one other rectangle (bottom right strip).

I tried to place the black & grey squares in different places in an effort to create negative space. I didn't want everything centered.

Notice that all this is laid on top of a previous quilt I had made that was the size I was aiming for. You probably also found that I am not the most precise person. No measuring or planning ahead for me on this project.


I then sewed all the strips together to complete the front piece of my modern quilt!


Next, I used remaining scraps to make a long strip the width of the quilt. I sewed solid pieces of the same dark grey as used for the sashing to this strip to make the back of the quilt, then basted the quilt sandwich with safety pins on my kitchen floor - while watching a good movie with the family, of course.


Next came the free-motion quilting. I used a basic stippling design.


Next, the binding.
I had a hard time deciding on the binding. I usually prefer to use remaining scraps, but I felt this quilt was so random that it almost needed one solid binding to frame it. What do you think?


I do hope this tutorial helps you get out the fabric and start cutting & sewing
your own modern quilt without a pattern!
And please please please show me what you create as a result!


One thing you have to know about me is that I do all my projects around the house in the midst of my family. No special room. Just the kitchen table, the bed, and the kitchen floor. (Don't let a small home discourage you from being creative!) Since we have a pretty small house, that keeps me in the middle of all the family action. And it inspires my kids to do their own projects, too. Since we are a homeschool family, that means that sometimes I drill my elementary kids on their Latin or spelling between stitches. It also can mean that we all will ditch the academics to pull out the paint or fabrics. Here is a picture of our Creative Kitchen Table today. This was a Nerf gun modification project taken from youtube.


Ok. So it wasn't a pretty project. But I love that they do such things!

4.29.2010

Clothes Design Tutorial - An Invite From A Fellow Blogger and A Contest

Over the last few weeks, I made two tops for a contest at Spring Top Week. It was a good challenge for me as I haven't made clothes in a while, and I have some new summer clothes, to boot!

The blue top and a clothes design tutorial is blogged here.


This shirt, with a clothes design tutorial is blogged here.


Well...Andrea, at The Train To Crazy, checked out the Spring Top Week Flickr group photos, and has invited me to put one of my tops on her weekly blog party. There are alot of other great tops. Check them out. There are even some tutorials, like this one that was made with a bedsheet from Urban Outfitters. I love the idea of using sheets! There are some great tutorials for children's clothes, too. This one is adorable. Little people's clothes are a great place to start with some simple clothes design.

So, if you are looking for more clothes design tutorials, or reviews of patterns, check out The Train To Crazy on Thursdays.

3.24.2010

Lined Basket

Here is a quick project to carry your handsewing, knitting or good books in. How about putting quiet activities in it for your kiddos at church? It takes less than an hour (including rummaging through recycling to find cardboard).
You will need an old basket, fabric, glue or hot glue gun, cardboard, and a scrap of batting or other cushy stuff. Here is how I did it:

Cut a strip of fabric 3 inches taller than the basket and an inch or two longer than the inside of the basket. (You can use a string to measure around the inside of the basket, then lay that out to figure the length, adding an inch for seams, and an inch for good measure)
Sew the ends together to make a band that will fit in your basket.
Iron a 1 inch hem in the top of this band.
You could stitch this hem in place, but it doesn't seem to need it.
Glue the band inside the basket using a hot glue gun.
(Place the bead of glue just at the top edge of the basket)
Here is the bottom of the basket with the bottom edge of the fabric laying neatly for easy placement of the bottom pad.
To make the bottom pad, cover a piece of cardboard cut to a size that will fit nicely inside your basket.  Glue on the cotton batting - or other cushy stuff. I used spray adhesive for this step, but any glue will work fine. I love spray adhesive. A new favorite.
Cut a piece of fabric 1 inch larger than the cardboard pad all around edges.
Lay the wrong side of the fabric against the padded side of the cardboard.
Pull the fabric up over the edges of the pad with the fluffy stuff down.
Glue around edges using hot glue gun.
You can poke pins into it to hold it if necessary, or use closepins.
Put the pad in the bottom of the basket. I didn't glue mine down since it fits tightly.

Now fill with your favorite project, or with goodies for a gift.
When you make one, put in on the flickr group for us all to see.
Now I'm off to Korean Martial Arts with my boys with a project in my new basket to work on while waiting...

p.s. when i started this project i thought this would be a fun one for you, lizzy :)

1.02.2010

Vegan Biscotti

In bowl on Kitchen Aid mixer combine wet ingredients:
 2 1/2 cups cold water
2/3 cups egg replacer (from health food store)
4 cups sugar
1 tbsp vanilla
2 tbsp ground anise seeds (I grind seeds in a coffee grinder)

Then add in dry ingredients:
8 cups flour
4 tsp baking powder
2 tsp baking soda
1 tsp kosher salt

Add in desired goodies:
2 cups dried, chopped fruit
2 cups chopped almonds
1 cup white or chocolate chips

Dough will be sticky. Using flour on board and hands, shape into 7 logs, putting 2 on a greased tray at a time. Bake 375 for 25-30 minutes until bottom gives a hint of turning brown. They will be a smidge under cooked.


Cut into 1 inch strips, giving all the ends to husbands, children, dogs and impatient bakers to hold them over till the finished product. You can see someone already stole the end off this strip. Watch for little sneaky fingers while using knife!


Put the sliced cookies onto a a tray with the cookies cut edges up with air space between cookies. After getting all the logs cut and onto trays, lower the oven temperature to 200. Put them in the oven for their second baking. After 1 hour take out the trays and turn over each cookie so the other side can dry and return them to the oven for another 1 hour. After cookies cool completely (I leave them in the oven over night) store them in air tight containers like a ziplock.


One time we lost a package of these in the trunk of our car. It was months later when we rediscovered them. We ate them. They tasted great! They ship well and last forever. Send them to friends in the service. Put them in your bomb shelter. Bury them in your time capsule! Or you could always eat them with your morning coffee.

9.10.2009

fabric frame


I love quick projects. Here's one to be completed in 15 minutes or less!
I used a picture from my daughter's wedding and leftover fabric we used for the event - homemade apple butter with fabric tied on the lids with twine for favors - yum!

Here's how:
1.Take apart your purchased frame.
2.Spray adhesive on one side of the cardboard that comes in the frame. Lay your fabric on top, and press out any wrinkles. Cut away extra fabric.
3.Spray adhesive on back of picture then center it on the fabric.
4.Put the frame back together and it is complete!! Easy!!
Related Posts Plugin for WordPress, Blogger...