Showing posts with label vintage fabrics. Show all posts

3.08.2011

Tuesday's Thrift


Quite a stack of vintagy fabric goodness.

I gave the dress on top of the stack to my Dear One.
A totally 60's dress. 
I can't wait to see how this creative girl uses it in her wardrobe.

Second from the top is a sheet. 
I'm pretty sure I had one just like it when I was a kid. 
Pass it up, I could not.
What will I make?
I have no idea.
Yet.

The mint polka dot sheet was spoken for at first sight by my young friend. 
This new and excited sewist
wants me to help her in the making of this:


And the previously loved chenille baby blanket at the bottom of the stack?
Well, of course I'm saving that one,
for someday...

when there are grandbabies
needing this grandmama to sew them
all things good. 

1.31.2011


This messy mess I could bear no longer
though I quite think
this photo makes it seem so lovely.


 In truth it was not so lovely.
Being the first thing to be seen 
upon entry to our homey home
today it greeted fair guests no more.

Gathering another canvas from Our Dear One and Her Love's wedding,
(only three more lovelies awaiting their fate remain)
some cotton batting,
an ample piece of vintagy wool blanket


 one rather handy staple gun,


and a few minutes stolen 
from time that really should be spent
reading and preparing 
for a logic and literature class
that a handful of homeschoolers
await for me to teach
on the day next,


And voila!


Surely Now I can think
heady thoughts
of symbolism and plots,
for one little eensy piece
of my homey home


has a little touch of order
mingled with beauty,
happy reminders of days past,
and friends so dear.


Now off to the smarty books I go...

12.03.2010

Vintage Christmas Stocking Project


These stockings I made from vintage pillow cases and trimmings.


I love them. I'm seriously considering getting rid of the old traditional red and green stockings and trading them for these. I know. After all these years, that almost seems like sacrilege. My family has given permission. They are not too attached to the old. Red and green have never been my favorite colors anyways. I'm on the hunt for more pillowcases. Pillowcases that are not flowery as there are lots of boys around here!


Here is a set I helped my young Doodling Friend make on Thanksgiving weekend. She loves bright and happy colors. For the pattern size and shape, we just copied one of the old stockings. I can't think of the last time I actually bought a pattern! She appliqued names on hers, and will be giving them as gifts. My Bambi applique is from here. A pretty simple project for the holidays. Give it a try.

8.29.2010

Banners

Banners for babies:


And banners for weddings:

Adorable wedding photo by Raya Photography

which I like well enough.
Then I started adding random scraps to them
like vintage seam tape, lace, ric-rac and dingle-balls.
Dingle-balls?
Is that my own invented word?
Or am I just a country bumkin that continues to make up my own vocabulary?
My children choke and laugh whenever I say it,
then I am reminded that it's not a real word at all,
for I say it so confidently
like it exists.
I googled it and it doesn't.
Well!
What else is one to call them?
They are dingle-balls.
I have a whole pile of them.


The dingle-ball giver used them 'back in the day'
to make her pants longer
for she is tall.
I picture her tall and slim
wearing moccasins and jeans
with blond hair in long braided pigtails
tied with leather barrettes.
Well, enough of my dingle-ball bunny trail! I put these banners in my Etsy shop so they could be special ordered for any occasion. Or you can pull out some scraps and make your own! This makes a great personalized gift, and can be a good project for young sewers. Uhh hemm. Christmas is coming.... And if you have any creative ideas for using up an enormously large roll of brown and creme dingle-balls please do let me know!


8.09.2010

Vintage Floral and Aqua Quilt


Here is my latest and final quilt that I designed using mostly vintage fabrics. It is similar to Caleb's quilt, only smaller, a baby-sized quilt. As usual, my favorite part is the random yellow square in the corner. This quilt, along with my other vintage floral quilt, was mostly made of vintage fabrics a friend gave to me. This one has a Sage Kona Cotton surrounding the 'coins' rather than being all floral prints. I think I prefer it this way.


I love the backs of quilts.


Both quilts are now in my Etsy shop for purchase. They would make a great gift for twin girls!
Or if you want to make your own, a tutorial should be up soon.

7.02.2010

A perfect day

I am tired.
It's late.
The house is quiet.
I'm just now resting. 
I have a nice hot cup of coco cupped in my hands.
Not plain, but with a smallish scoop of ice cream
and Peppermint Schnapps.
I was out of the preferred Baileys.

I think about my day and I am satisfied.
Up early for a city venture to help my Girl.
I clean. She unpacks. We talk.
We walk about the city
and see it's beauty.

Back at the lonely, nearly vacant abode,
I help. I love.
It is no longer home.

Upon returning to my own abode,
I clean. I comfort. I help. I drive.
I rearranged Oldest son's room.
It finally feels homey.
I fold laundry. Arrange some flowers on my table.
Cozy up on the couch.
Listen to the stories of the missed day.
Goodnight kisses & prayers.

Yes. I am tired. But it is a good tired.
Tired from loving.
Tired from serving.
Tired from being a mom.
I am happy.
It is simple, but it is just what I do and I love it.
It was a perfect day.

Here are some of today's pictures.
Pictures of the beautiful new world of my Girl and her Love.


I love this picture...except for the King Kong of all dust bunnies:


A beautiful stack of thrifted vintage fabrics - is that not a piece of art?
Just sitting there, not sewn into anything at all. 


Next time:


twenty-three. the simple fulfillment of being a mom.
twenty-four. a new city with its many and beautiful places to explore.
twenty-five. an apartment I can drive to in a city I said I would never drive to. I'm a country girl. But now I'm going to have to be a country girl that drives to the city.

4.29.2010

Clothes Design Tutorial - An Invite From A Fellow Blogger and A Contest

Over the last few weeks, I made two tops for a contest at Spring Top Week. It was a good challenge for me as I haven't made clothes in a while, and I have some new summer clothes, to boot!

The blue top and a clothes design tutorial is blogged here.


This shirt, with a clothes design tutorial is blogged here.


Well...Andrea, at The Train To Crazy, checked out the Spring Top Week Flickr group photos, and has invited me to put one of my tops on her weekly blog party. There are alot of other great tops. Check them out. There are even some tutorials, like this one that was made with a bedsheet from Urban Outfitters. I love the idea of using sheets! There are some great tutorials for children's clothes, too. This one is adorable. Little people's clothes are a great place to start with some simple clothes design.

So, if you are looking for more clothes design tutorials, or reviews of patterns, check out The Train To Crazy on Thursdays.

4.24.2010

Clothes Design Tutorial - sort of

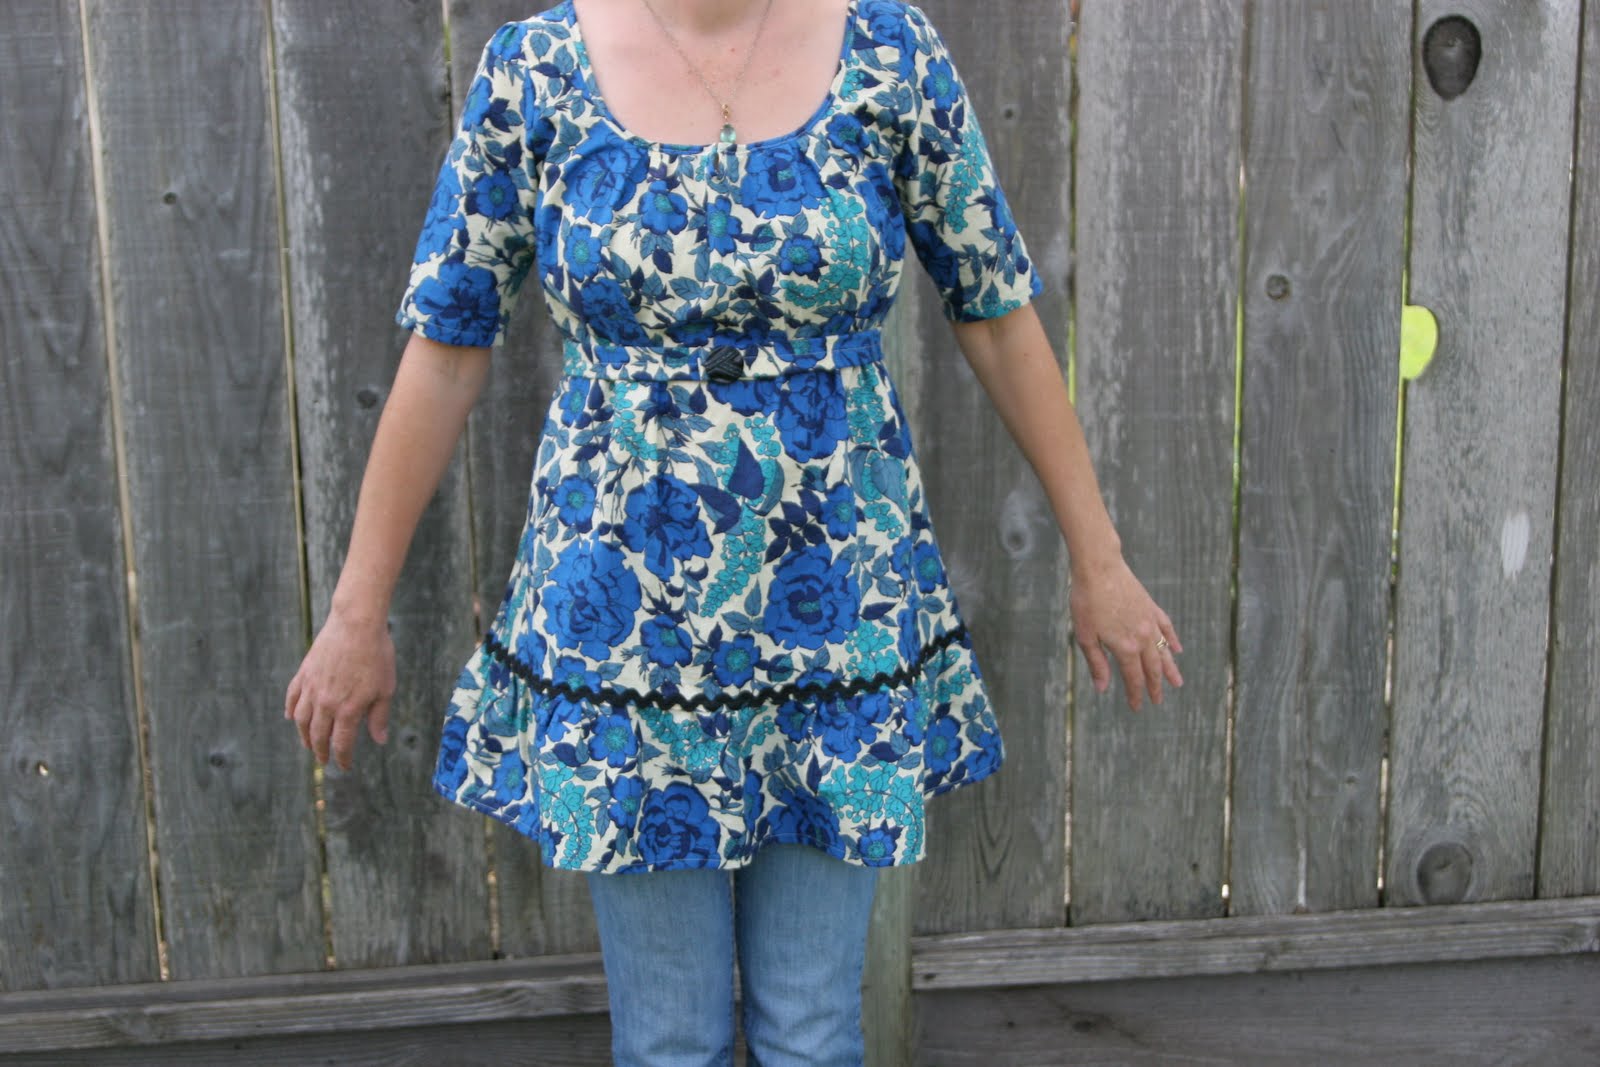
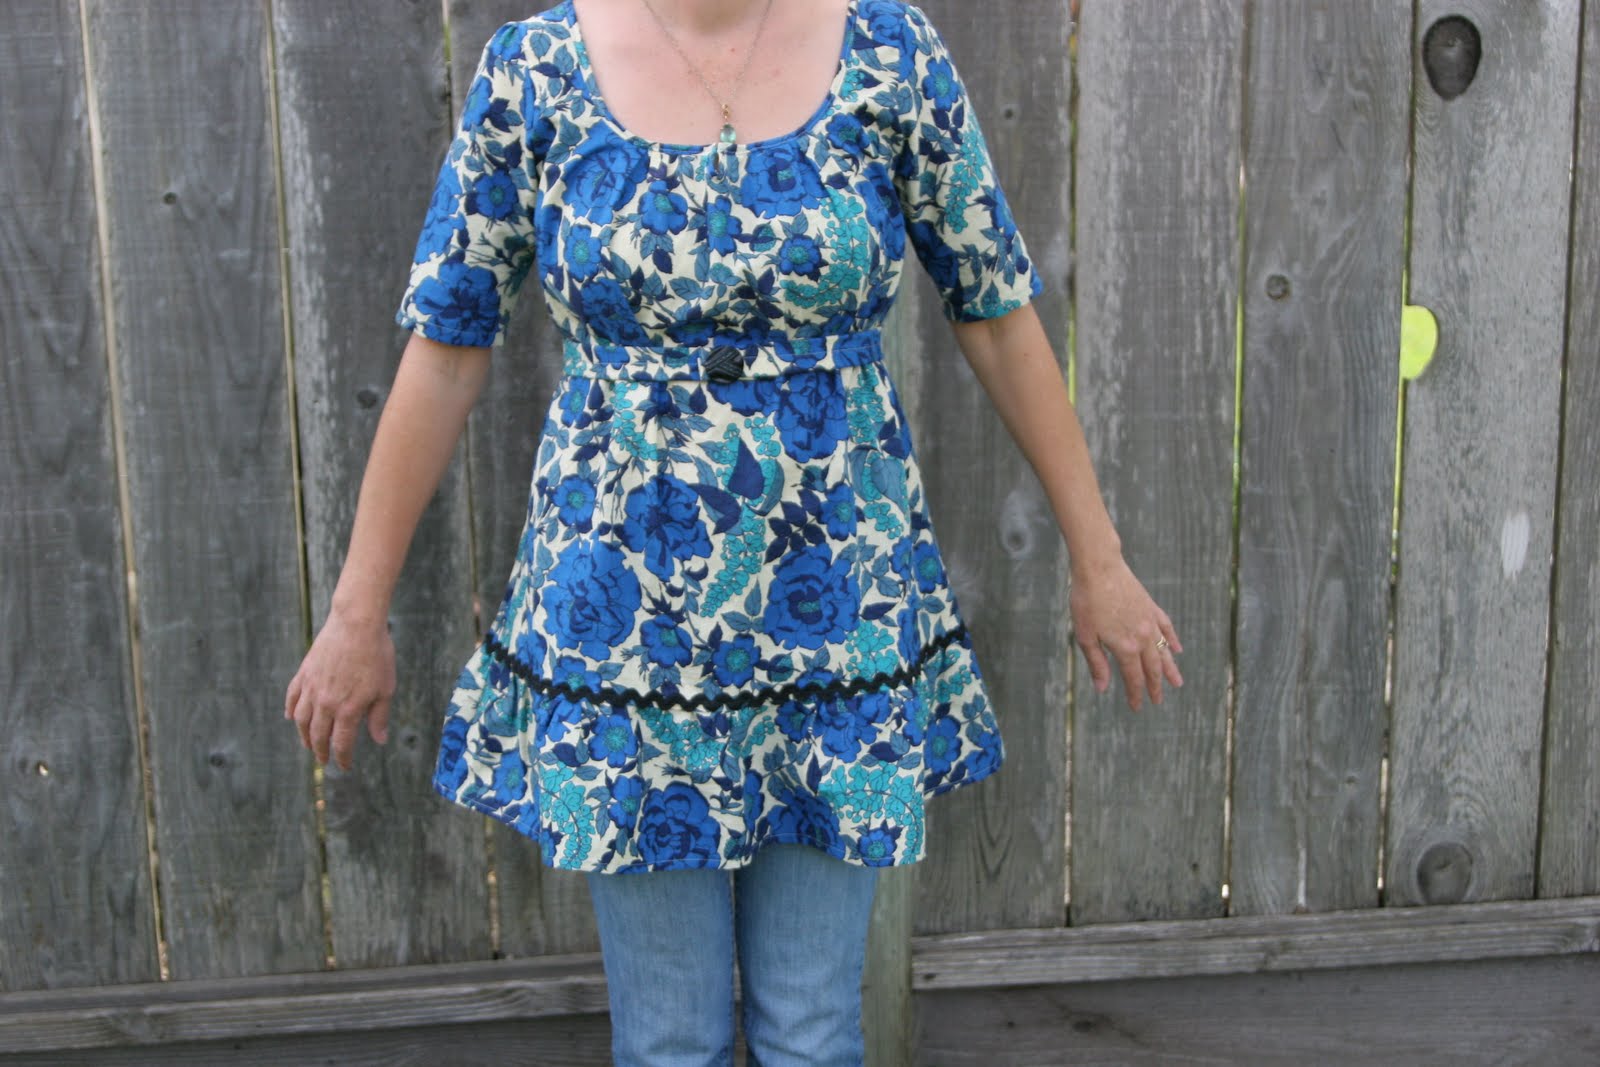
I started with this beautiful piece of vintage fabric given to me by a dear friend.


Then I saw another friend wearing a lovely blouse. I tried to take notice of the details (while being a good friend, of course, and carrying on a conversation) then sketched a picture when I had a spare moment.


When I had an evening to myself to work on my clothes design project, I took a few of my own shirts out of the closet. I chose each of them for a different aspect. One had the curved shape I wanted in the back. Another had the measurement I would need across the back and chest so I could slip it over my head. Still another one had the sleeve shape and the flair below the waist.


I laid the clothing,  one at a time, over  the a piece of butcher paper (I usually use muslin for this) sketching the desired shapes the best I could. Next I cut them out. It was nice to have a large piece of fabric for this. I didn't have to worry about making mistakes. I knew I had plenty of room to work with for this clothes design project.


I put in all the pleats and gathering, then sewed it all together, trying it on several times to check the fit. The sleeves were definately the toughest shape to figure out. I had to give them a second try. Wherever I was unsure, I set my stitching length to a basting stitch just in case I needed to make changes. This makes using the seam ripper easier. After trying it on again to make sure the fit was right, I re-stitched seams with a regular stitch length set on my machine.


I also added a vintage button to a belt and large ric rac to set off the ruffle.


So there it is.
My clothes design tutorial. Sort of.
All in all, it was pretty simple.


So. Find some lovely fabric. Now. Go into your closet and find your favorite shirt or dress. Or go raid your friend's closet. Tell her you will return it unharmed in a day or two. (I plan on raiding my daughter's closet soon.) Look for designs without zippers and complicated collars. Simple is best.

Now. Give it a try. And when you do, put a comment with your blog link. I would love to check it out.
Related Posts Plugin for WordPress, Blogger...