

Wednesdays are bread days in this homey home.

After some messy, confusing attempts at making this complex bread, I am getting better at it, and thought I would share what I have learned so others might attempt artisan bread baking. Although I am not a professional, either in the photographer or baker category, I thought some might like to see my process. It's the next best thing to rolling up ones sleeves and hanging out for a day and a half. Not that baking a loaf of artisan bread takes all that time, it's just snippets of time here and there, making for a great homey day. It is my hope that seeing the process in pictures, will encourage some to give it a try.
This recipe is adapted from the book Amy's Bread by Amy Scherber and Toy Kim Bupree.
Here we go. A crazy long post mostly in pictures.
***********************************
The night before, make the biga starter by doing the following:
In a large bowl combine 3/4 cups very warm water with 1/8 teaspoon active dry yeast. What is very warm water? About 105 degrees...or very hot to the touch, but not so hot you want to move your hand away.

Stir in 1 1/2 cups plus 2 tablespoons unbleached all-purpose flour.
If it is too thick like this:

add in warm water a tablespoon at a time:

until it looks more like this:

Stir vigorously with a wooden spoon for a few minutes until it becomes an elasticy batter:

Cover your biga starter with saran wrap and a towel. Set on your counter over night. In the morning your biga should have risen, and be 'alive'. It will look a little bubbly:

Set it aside for a while longer.
In another very large bowl combine 1/4 cup very warm water and 1 teaspoon active dry yeast. Let stand for a few minutes:

Meanwhile, in another bowl, combine 3 1/2 cups whole wheat flour, 2 1/3 cups unbleached bread flour, 2 cups old-fashioned rolled oats, 2 tablespoons kosher salt, 2 tablespoons sesame seeds, 2 tablespoons poppy seeds, 1/4 cup sunflower seeds, and 2 tablespoons flax seeds. The seeds are really up to you. If you don't have them, don't use them, or put in what you like. Set aside:

Back in the bowl with the yeast and water setting, add 2 3/4 cups more cool water (75 degree-ish), 2 tablespoons molasses, 2 tablespoons canola or vegetable oil, 2 1/2 tablespoons honey:
 |
1 1/2 cups of your biga starter:

Mix with your fingers for a few minutes until it is pretty well combined.

like this:

Now add the mixture of flours. I used a hard plastic spatula to scrape the sides of the bowl and pull the wet ingredients into the dry, but a dough scraper is recommended.

When it is all combined, turn it out on to a very lightly floured board:

I use my metal dough scraper to gather the dough into a ball:
Not a good time for a hug or an itchy nose:

I was pretty accustomed to using bunches and bunches of flour in my kneeding, but artisan breads are more wet, and require the use of as little additional flour as possible. There are 2 things I rotated between in order to help knead such a sticky dough.
One. From time to time, I simply pat my hands in a small pile of flour to flour my fingertips:

Then gently touch the dough and continue kneading:

Two. I would use the dough scraper to lift the dough when it becomes too sticky again:

After a good amount of kneading, the texture changes to a nice stretchy dough. Here is my basic kneading technique.
I lift the edge of the dough either with the scraper:

or as it becomes less sticky, with my hands:

I fold it towards me and press the heals of my hands down:

then away from me:

I turn the dough a quarter turn then fold it in half towards myself again:

press down and away again:

My camera man took a turn:

After 8-10 minutes or so of working the dough, put the nicely kneaded ball in a large bowl:

Cover with oiled saran wrap.
Cover with a towel.
Set aside to rest for 20 minutes or so:

Now the dough stretches easily:

Press 1 cup toasted (and cooled) pecans into your dough in the bowl:

Knead it together in the bowl, pulling sides into the middle:

After kneading it on my board again for a few minutes, the dough goes into my large, lightly oiled bowl. Cover with oiled saran wrap and let rise 2 hours.
My second batch can be seen in the back. This recipe makes 2 loaves. I doubled it making 4 loaves and divided it into 2 bowls at this stage. It was beneficial for me to make this recipe several times to learn the techniques before doubling it to make 4 loaves rather than 2. But after you get the hang of it, it really takes hardly any extra time to make a double batch. I find I am much more eager to give away a loaf when I have an abundance.

The dough is fully risen when an indentation made by pressing your finger into the dough does not spring back:


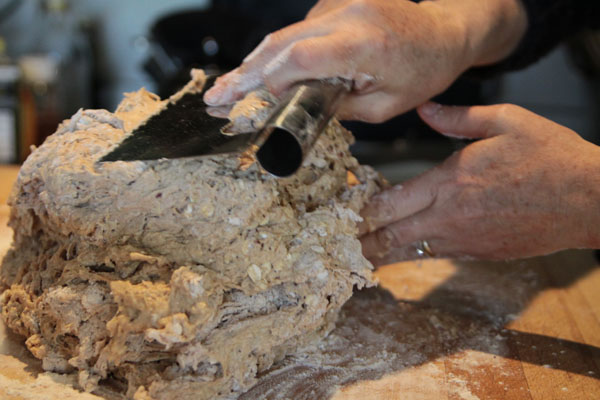
Divide dough in half with sharp knife or dough scraper:

Press each piece into a rectangle removing all air bubbles:

Roll the skinny end away from you:

Pinch edges to seal the log:


Place seam side down in a lightly greased 5x7 bread pan.
Sprinkle with oats or sesame seeds if desired.
If they don't stick, dip your fingertips into water and rub the top of the loaf moistening it just a smidge, then sprinkle on the oats and press down into the dough a bit.
Cover again with oiled saran wrap and let rise in a warmish place for 2 to 2 1/2 hours till doubled.

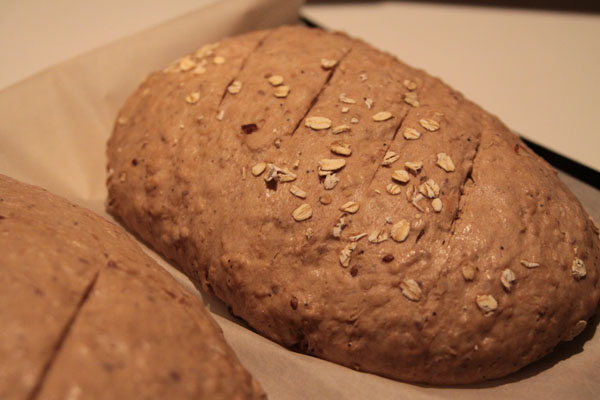
Here are my 2 other loaves. I didn't have enough bread pans, so I placed them on a baking sheet lined with parchment paper. It works. I cut a few slits in the top with a sharp knife.
OK. Here is where it gets a bit tricky. But hold on. It's worth it:
20 minutes before baking place a cast-iron skillet and a mini loaf pan or foil pie plate on the floor of the oven.
Place the oven rack to be used for the bread in the middle of the oven.
Preheat the oven to 450 degrees.
5 minutes before the loaves are ready to bake, place 2 ice cubes in the small loaf pan in the bottom of the oven.
When the loaves are ready, place them in the oven. Pour 1 cup or so of water into the cast-iron skillet and quickly close the door. It's all about the steam! The recipe recommends a quick spray with water after a minute, but I can't find a spray container that is not filled with some weird science project concoction, so I haven't tried it.
After 20 minutes reduce heat to 400 degrees and bake for another 20-25 minutes. This recipe says to bake till an instant read thermometer reaches 210 degrees. That seems a little over cooked to me. I like to take it out of the oven at about 190 degrees. Remove from pans as soon as cool enough to handle. Let it continue to cool on a rack. If at all possible, try to refrain from slicing and eating for at least 15 minutes, making it easier to slice. But if your home is like my home, that is quite a feat.

A few tips:
Get familiar with how 'very hot' and 'warm' water feel to the touch. Using a thermometer, get one bowl of water to 190 degrees and feel it. Then try 75-80 degrees. I can pretty much tell both my water temperatures by just touching tap water. I don't get out my thermometer any more.
Makes great toast with peanut butter and honey.
I do so hope this has been helpful. I hope it whets a desire in you to learn more about the art of baking bread. In days when everything is so fast paced and purchased, it can be quite fulfilling to slow down and create beautiful and healthy artisan breads.


this looks so tasty...
ReplyDeleteThis was so tasty last week. Thanks for making my favorite!!!
ReplyDelete